Jak zbudować stronę www z Hugo i Netlify
Niedziela, 25 Sie, 2019Aby rozpocząć pracę ze statycznym generatorem stron Hugo należy zainstalować Git oraz Go.
Instalacja Hugo przy pomocy Chocolatey na maszynie z systemem Windows
Jeśli nie posiadamy zainstalowanego Chocolatey to wystarczy wpisać w Windows PowerShell:
Set-ExecutionPolicy Bypass -Scope Process -Force; iex ((New-Object System.Net.WebClient).DownloadString('https://chocolatey.org/install.ps1'))Pamiętajmy aby uruchomić PowerShell jako administrator.
Sprawdźmy czy prawidłowo się zainstalował:
PS C:\WINDOWS\system32> choco
Chocolatey v0.10.15
Please run 'choco -?' or 'choco <command> -?' for help menu.
A następnie przechodzimy do instalacji Hugo.
Wpisujemy w wierszu poleceń (cmd.exe - windows) ponownie w trybie administratora:
choco install hugo -confirmJeśli instalacja następuje prawidłowo to powinniśmy zobaczyć coś podobnego do poniższego wydruku z wiersza poleceń:
Installing the following packages:
hugo
By installing you accept licenses for the packages.

hugo v0.57.2 [Approved]
hugo package files install completed. Performing other installation steps.
Downloading hugo 64 bit
  from 'https://github.com/gohugoio/hugo/releases/download/v0.57.2/hugo_0.57.2_Windows-64bit.zip'
Progress: 100% - Completed download of C:\Users\jacek\AppData\Local\Temp\chocolatey\hugo\0.57.2\hugo_0.57.2_Windows-64bit.zip (11.48 MB).
Download of hugo_0.57.2_Windows-64bit.zip (11.48 MB) completed.
Hashes match.
Extracting C:\Users\jacek\AppData\Local\Temp\chocolatey\hugo\0.57.2\hugo_0.57.2_Windows-64bit.zip to C:\ProgramData\chocolatey\lib\hugo\tools...
C:\ProgramData\chocolatey\lib\hugo\tools
 ShimGen has successfully created a shim for hugo.exe
 The install of hugo was successful.
  Software installed to 'C:\ProgramData\chocolatey\lib\hugo\tools'

Chocolatey installed 1/1 packages.
 See the log for details (C:\ProgramData\chocolatey\logs\chocolatey.log).
Możemy sprawdzić czy na pewno instalacja przebiegła prawidłowo:
hugo helpPo odpaleniu polecenia powinniśmy zobaczyć wydruk w wieszu poleceń:
hugo is the main command, used to build your Hugo site.

Hugo is a Fast and Flexible Static Site Generator
built with love by spf13 and friends in Go.

Complete documentation is available at http://gohugo.io/.

Usage:
  hugo [flags]
  hugo [command]

Available Commands:
  config      Print the site configuration
  convert     Convert your content to different formats
  deploy      Deploy your site to a Cloud provider.
  env         Print Hugo version and environment info
  gen         A collection of several useful generators.
  help        Help about any command
  import      Import your site from others.
  list        Listing out various types of content
  mod         Various Hugo Modules helpers.
  new         Create new content for your site
  server      A high performance webserver
  version     Print the version number of Hugo

Flags:
  -b, --baseURL string         hostname (and path) to the root, e.g. http://spf13.com/
  -D, --buildDrafts            include content marked as draft
  -E, --buildExpired           include expired content
  -F, --buildFuture            include content with publishdate in the future
      --cacheDir string        filesystem path to cache directory. Defaults: $TMPDIR/hugo_cache/
      --cleanDestinationDir    remove files from destination not found in static directories
      --config string          config file (default is path/config.yaml|json|toml)
      --configDir string       config dir (default "config")
  -c, --contentDir string      filesystem path to content directory
      --debug                  debug output
  -d, --destination string     filesystem path to write files to
      --disableKinds strings   disable different kind of pages (home, RSS etc.)
      --enableGitInfo          add Git revision, date and author info to the pages
  -e, --environment string     build environment
      --forceSyncStatic        copy all files when static is changed.
      --gc                     enable to run some cleanup tasks (remove unused cache files) after the build
  -h, --help                   help for hugo
      --i18n-warnings          print missing translations
      --ignoreCache            ignores the cache directory
      --ignoreVendor           ignores any _vendor directory
  -l, --layoutDir string       filesystem path to layout directory
      --log                    enable Logging
      --logFile string         log File path (if set, logging enabled automatically)
      --minify                 minify any supported output format (HTML, XML etc.)
      --noChmod                don't sync permission mode of files
      --noTimes                don't sync modification time of files
      --path-warnings          print warnings on duplicate target paths etc.
      --quiet                  build in quiet mode
      --renderToMemory         render to memory (only useful for benchmark testing)
  -s, --source string          filesystem path to read files relative from
      --templateMetrics        display metrics about template executions
      --templateMetricsHints   calculate some improvement hints when combined with --templateMetrics
  -t, --theme strings          themes to use (located in /themes/THEMENAME/)
      --themesDir string       filesystem path to themes directory
      --trace file             write trace to file (not useful in general)
  -v, --verbose                verbose output
      --verboseLog             verbose logging
  -w, --watch                  watch filesystem for changes and recreate as needed

Additional help topics:
  hugo check   Contains some verification checks

Use "hugo [command] --help" for more information about a command.
Jak stworzyć swoją pierwszą stronę w Hugo
Praca w Hugo jest naprawdę bardzo instynktowna. Aby stworzyć swoją pierwszą stronę wystarczy uruchomić polecenie w wierszu poleceń:
hugo new site nazwa_naszej_stronyPo uruchomieniu powinniśmy zobaczyć następujący tekst:
Congratulations! Your new Hugo site is created in C:\[katalog w ktorym stworzylismy projekt].

Just a few more steps and you're ready to go:

1. Download a theme into the same-named folder.
   Choose a theme from https://themes.gohugo.io/ or
   create your own with the "hugo new theme <THEMENAME>" command.
2. Perhaps you want to add some content. You can add single files
   with "hugo new <SECTIONNAME>\<FILENAME>.<FORMAT>".
3. Start the built-in live server via "hugo server".

Visit https://gohugo.io/ for quickstart guide and full documentation.
Świetnie, stworzyłeś swój pierwszy projekt w Hugo !!!
Przy tworzeniu swojego pierwszego projektu w Hugo, wiekszość korzysta już z ogólnie dostępnych skórek (hugo theme). My będziemy bardziej ambitni i spróbujemy stworzyć własną skórkę!
Stworzenie własnej skórki w Hugo jest banalnie proste, wystarczy wpisać w wierszu poleceń:
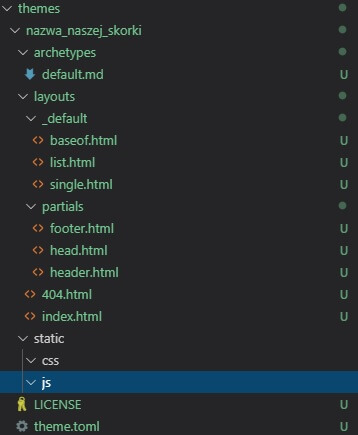
hugo new theme nazwa_naszej_skorkiStruktura folderów po stworzeniu nowej skórki:

Następnie w config.toml dodajemy:
baseURL = "http://example.org/"
languageCode = "en-us"
title = "My New Hugo Site"
theme = "nazwa_naszej_skorki"
W pliku layouts\index.html dodajemy:
{{ define "main" }}
  <h1>Witaj swiecie!</h1>
{{ end }}
Sprawdzamy czy w pliku layouts_default\baseof.html znajduje się następujący kod:
<!DOCTYPE html>
<html>
    {{- partial "head.html" . -}}
    <body>
        {{- partial "header.html" . -}}
        <div id="content">
        {{- block "main" . }}{{- end }}
        </div>
        {{- partial "footer.html" . -}}
    </body>
</html>
Jest on tworzony automatycznie przez Hugo.
Jeśli wszystko jest na miejscu to czas na uruchomienie naszej pierwszej strony w Hugo!
W wierszu poleceń wpisujemy:
hugo serverJeśli wszystko poszlo po naszej myśli to pod adresem: http://localhost:1313/ powinniśmy zobaczyć naszą stronę.
Czas aby nasza strona zawitała na serwerach Netlify :)
Jak umieścić stronę WWW na Netlify
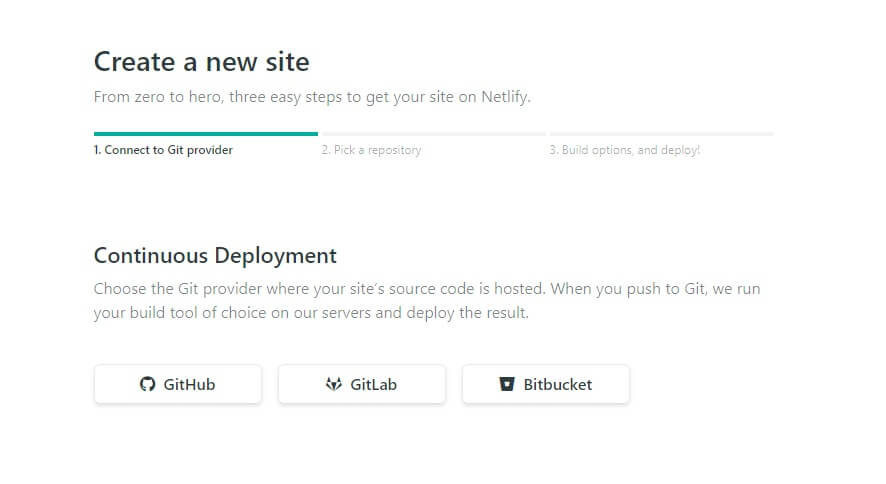
Stworzenie konta na Netlify jest bardzo proste i przede wszystkim darmowe. Możemy to zrobić na cztery różne sposoby: GitHub, GitLab, Bitbucket lub konto Email.

Następnie dodajemy nowy projekt i wybieramy repozytorium:

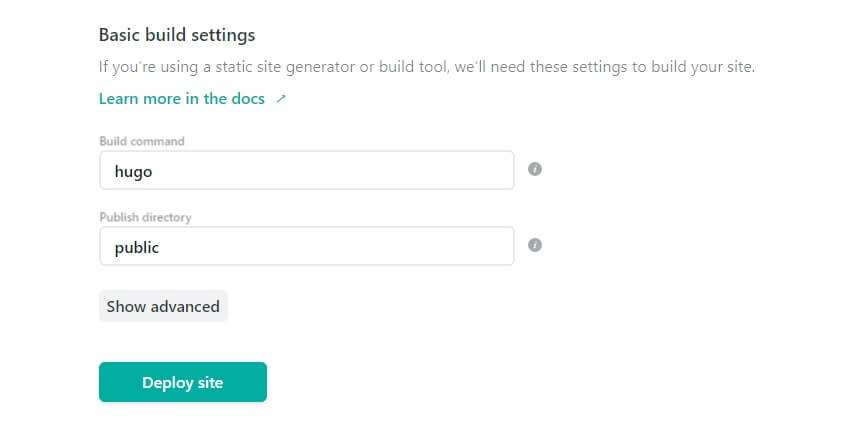
Wpisujemy komendę do zbudowania strony i nazwę katalogu:

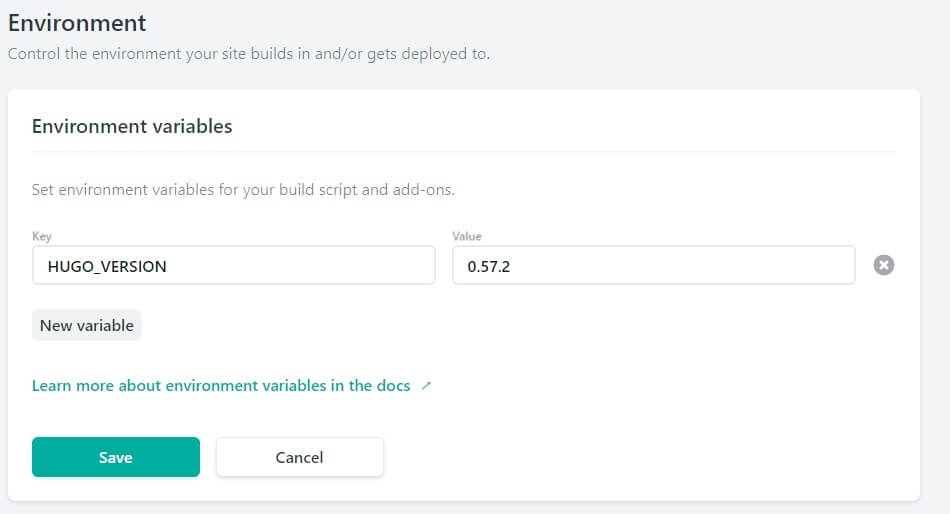
Oraz wpisujemy wersję hugo w Environment variables:

Gotowe! Po paru minutach (a w przypadku statycznego generatora stron Hugo są to sekundy) powinniśmy zobaczyć naszą stronę umieszczoną pod domeną Netlify. Oczywiście możemy ustawić własną domenę w Netlify ale to już zostawiam Wam.